'Snowy' Christmas Tree Ball Ornaments
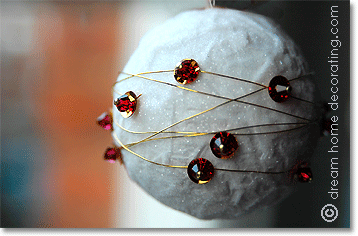
These Christmas tree ball ornaments are as luxurious looking as they're easy to make.
Create your own look for unique, personalized Christmas tree ornaments!
- How to make snowy Christmas ball ornaments;
- How the Christmas tree ball got rolling: a potted German Christmas ball history;
- How else to use these Christmas baubles.
You Will Need:
- styrofoam balls (always have one or two in reserve)
- thin gold or silver beading wire (or white, if you can get it)
- white tissue paper
- scissors
- PVA (water based) glue or Mod Podge
- a broad, flat brush for the glue
- 'snow' glitter
- beads/sequins
- sequin pins (they're like regular pins, but half the length)
- baking parchment to line your worktop & collect the glitter when you're done 'snowing'. PVA glue doesn't stick to it while you dry the Christmas tree balls.
How To Make Christmas Tree Ball Ornaments
Before you start: I like making a sturdy, well-secured eyelet before 'papering' the Christmas ball ornaments. If you don't want to go to the trouble, no worries: just skip steps 1 - 3 and start with step 4. You can glue an eyelet to the ornament at the end.
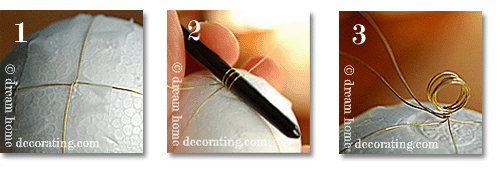
Step 1
Cut a length of wire that fits 3-4 times
around the styrofoam ball. Run it around the ball as if you were wrapping
a parcel (crossing underneath).
Temporarily secure the wire position with scotch tape. (Silver wire will be almost invisible under the white paper. To cover gold wire completely, you'll need at least two layers of tissue paper.)
Step 2
To make an eyelet, knot the wire ends together; then wind them around
a pencil or a knitting needle to make the eyelet shape.
Step 3
Secure and snip off excess wire.
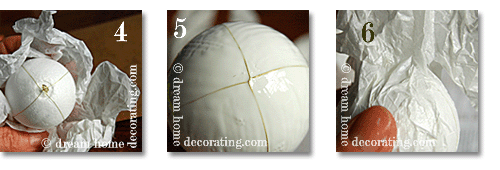
Step 4
Cut a piece of tissue paper that is large enough
to cover the whole ball. Scrunch it up thoroughly and gently pull it apart again.
Step 5
Take all scotch tape off, and coat the
styrofoam ball generously with PVA.
Step 6
Smooth the tissue paper onto the ball
without straightening out the wrinkles. Snip off any excess paper and smooth the edges down.
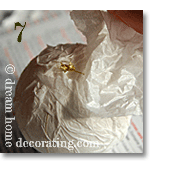
Step 7
If the paper rips and you get a 'bald' patch,
no problem. Just brush more PVA on and cover the offending patch with a
smaller piece of scrunched-up tissue paper.
Do the same if there's an area on the ball that doesn't look quite right yet. Add a second layer of tissue paper if you can still see the wire through the first.
There, the messy bit is almost done! You're about to turn this sticky thing into a snowy Christmas tree ball ornament. Ready? Here we go...
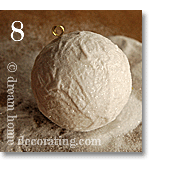
Step 8
Line your work area with baking parchment
(that makes it easy to collect the excess snow glitter later).
Cover the ball with PVA for one last time, and pour snow glitter over it.
Roll the ball in the glitter that has fallen on the parchment until it is well covered and looks like a snowball. Leave to dry well (takes at least 1 hour).
To decorate your DIY Christmas ornaments,
- try different types of beads and sequins,
- add ribbon if you want,
- go completely over the top if you feel like it!
If you skipped steps 1-3:
Once you've completely decorated your Christmas ornament, insert a wire loop
into the top. Glue it securely into the ball (with styrofoam-compatible glue).
It should be strong enough to keep your Christmas tree ball ornaments hanging in
the tree until Christmas is well over.
Three Christmas Tree Ball Designs
To Get You Started

Christmas tree ball #1, with golden sequins and pearl beads
Extremely easy Christmas ornaments to make: Take a sequin pin and use it to 'spear' a pearl bead onto a sequin. Stick it into the ball. Repeat.
Space the little stacks out evenly all over the ball. Don't try to make the distances all the same - it's really difficult to do and I don't think it's worth the trouble. Just start somewhere, and distribute the little jewels around the ball.

Christmas tree ball #2, with gold wire, sequins and crystal beads
Have a look at the picture to see how to fasten the wire under a sequin at the start and finish. After winding it around the sequin pin two or three times and pushing the sequin down, just wrap the wire around the ball in a slightly irregular fashion, crossing here and there.
At the end, wind it around another sequin pin to hold it in place. Then snip the loose wire ends off as closely as you can (or dare), and stick sequin/bead stacks into the ball ornament wherever you like, on or near the wire.

Christmas tree ball #3, with gold beads and a few red sequins (my husband calls this one the 'hedgehog')
This is an easy one, too. Pack the beads more tightly at the top of the hanging ball, and then let them "rain off" into an irregular edge at the sides. Put red sequins under a few of them (1 sequin for every 7 beads, roughly).
No sequins? No problem!
If you don't have the right kind of sequins to hand, try hole-punching your
own out of glossy giftwrap. That's how I produced the little red discs
for the 'hedgehog'.
Christmas Tree Ball: A Potted History
Little did the 18th-century glassblowers of Lauscha in Thüringen (East Germany) know that their Christmas tree ball ornaments would go on to become the quintessential Christmas tree decoration across the Western world.
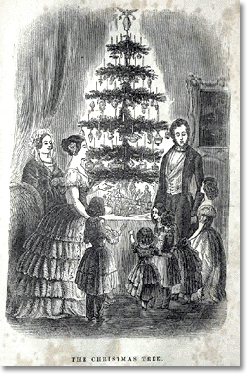
You see, it's all Prince Albert's fault.
Queen Victoria's German husband had these novelty ornaments - and a Christmas tree - brought over from Germany for the royal family's Christmas celebration at Windsor Castle.
An image was duly published in the Illustrated London News on December 23, 1848, showing the Queen, her Prince, and their young children gathered around the Christmas tree.
Within two years, that illustration had made its way across the pond and was published in the 1850 Christmas edition of Godey's Lady's Book, a US monthly magazine from Philadelphia with a countrywide readership.
Next thing you know, everyone was scrambling to keep up with the Windsors!
By the way, the creative glassblowers from Lauscha didn't just produce silver-colored Christmas tree balls ('baubles' if you're British); they also molded the delicate glass into more fanciful shapes like fruits, nuts, birds and toys. You can see (well, at least guess) some of those ornaments on Prince Albert's Christmas tree as well.
Don't Just Hang 'em On Your Christmas Tree ...
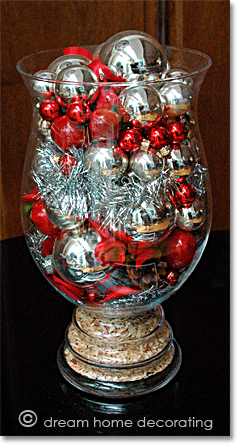
Of course, you're supposed to hang Christmas ball ornaments into your Christmas tree. But it's not compulsory. Here are a few more uses for your DIY Christmas ornaments:
♦ Attach them to a Christmas wreath or an evergreen garland;
♦ Use Christmas tree ball ornaments to beef up Xmas table decorations and centerpieces (check out examples from St Petersburg, Russia and from Germany);
♦ Hang your Most Gorgeous homemade Christmas tree ornaments into the window (or from a lamp);
♦ Pile them into tall glass containers (or under an old-fashioned cloche) for a contemporary look.
- Check out more Christmas tree decorating ideas (includes several homemade, easy Christmas ornaments to make!)
- Find new Christmas decorating ideas for your home;
- Try some Christmas craft & gift ideas;
- Learn all about Christmas traditions in Germany!
Yet to find the information you're looking for? Type a word or phrase into the search box below:
Return from Christmas Tree Ball Ornament to Christmas Tree Decorating Ideas
Return from Christmas Tree Ball Ornament to the Dream Home Decorating Homepage

