Homemade Christmas Wall Decorations:
'Noel' Paper Plate Craft
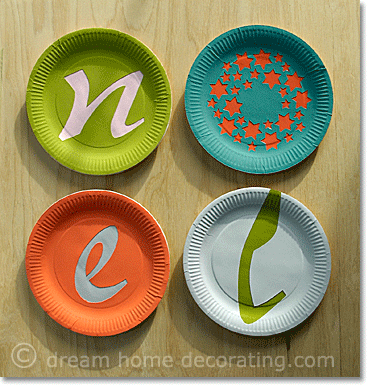
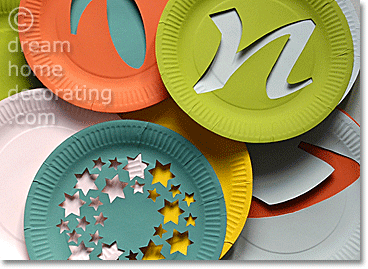
Try these paper-plate Christmas wall decorations for unique, cheap wall decor. (They also look good lined up on a Christmas fireplace mantel. And you can't see it in the pic above, but the letters are actually shiny :-)
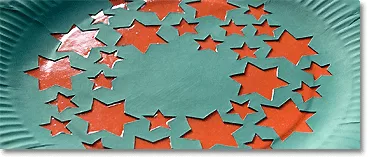
You Will Need ...
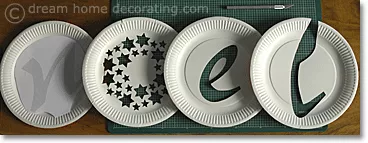
- 50+ paper/picnic plates
- plastic kitchen wrap (clingfilm/glad wrap)
- craft knife
- cutting mat
- scissors
- repositionable glue (spray or roll-on)
- matt-finish wall paint (sampler pots are great) or gouache
- cheap, flat brushes
- PVA craft glue or Mod Podge (gloss)
Step 1: Design Prep & Stencil Download
To download the stencils, you will need Adobe Reader - if you don't have it installed on your computer, you can download the latest version here (a new window will open so you can download it without leaving this page).
Click to download: n - o - e - l
PS) If you'd prefer a different typeface, just pick a font that goes with your chosen color scheme and room decor (Microsoft Word has loads of choice). Jiggle the size until it fits your plates. (And if you're a cheapskate like me, print 'em out in a light grey to save printer ink.)
Step 2: Cut
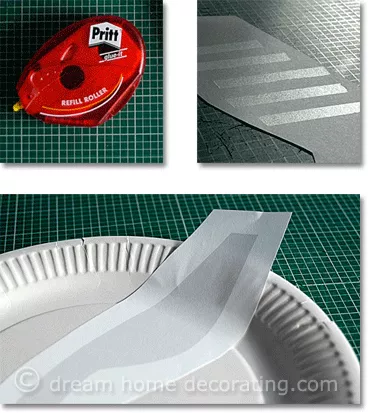
- Cut out your letter design, leaving a 1-inch white margin.
- Spray or roll the back with repositionable glue.
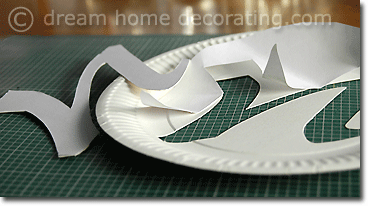
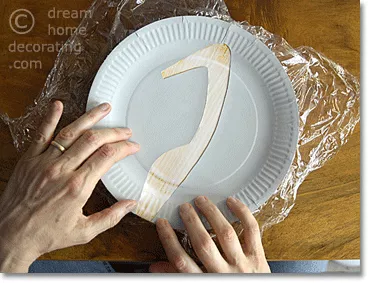
- Place the stencil on a paper plate & flatten it down as much as possible. (The 'L' was too long for the plate, so I let it stick out.)
- Next, carve the design out of the plate, and ...
- ... peel off the stencil paper.
Step 3: Paint
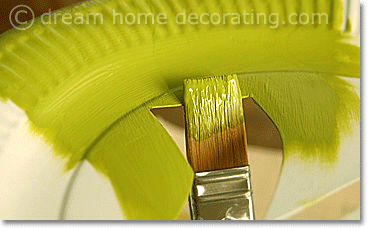
- When you paint the top plates, make sure you cover the cut face as well (to avoid any white showing later).
- The cut edges tend to curl a little under the fresh paint. To press them back into shape, wait until the plate is touch dry, then place it between layers of clingfilm in the middle of a stack of paper plates.
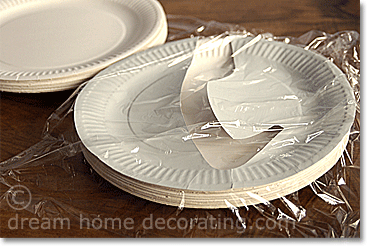
- Weigh the center down with an upside-down kitchen plate, and stack some important-looking tomes on top. Allow to sit for a few hours. That should do it.
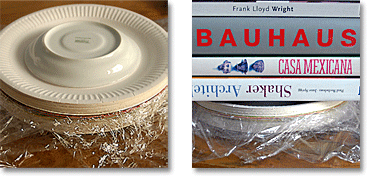
- In the meantime, paint your bottom plates.
- I painted mine in loads of different colors because I couldn't make up my mind about the final color combination.
Step 4: Gloss & Glue
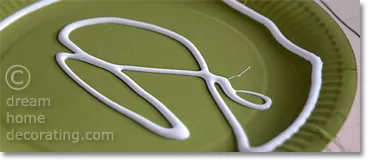
- Squeeze PVA glue all over a bottom plate, and distribute it evenly with a brush. Don't overload; use just enough so that any brush marks 'melt' in the glue.
- Then carefully place the top plate onto the bottom plate. Try to get it into the right place straight away, and avoid putting chinks in the PVA layer.
- Gently press the outer rim and the letter outline down into the glue until they decide to stay put. It may take a little persistence.
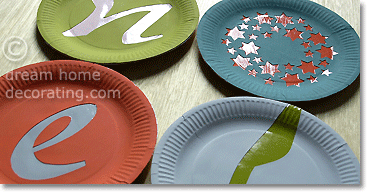
- Let dry until the PVA shows a clear surface:
Step 5: Show-Off Time!
There are two ways to fix the plates to the wall.
1. Painter's tape & double-sided sticky tape/pads
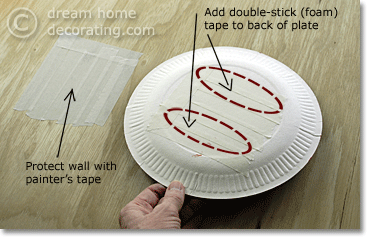
- Use painter's tape (in the USA it's blue, here in Europe it's usually cream colored) to protect both the wall and the plates from glue damage. When your Christmas wall decorations come down after the holidays, the painter's tape should come off without leaving a trace.
2. Eyelet & Thumbtack
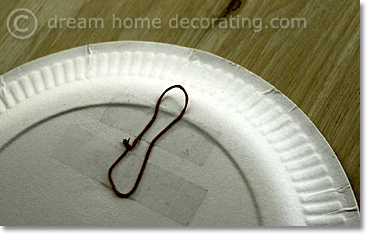
- These plates are so light that you could just tape an eyelet to the back (use strong sticky tape!)
Christmas Wall Decorations:
Troubleshooting
Paper plates may warp under water-based glue, particularly if the cutout design is large and irregularly shaped. Here's my remedy:
- Version 1: Cut a round of very sturdy card the size of the paper plate minus the rim. Glue to the back of your warped plate(s) with non-water-based glue (e.g. UHU). Position between two stacks of paper plates (as in Step 3), weigh down and allow to cure. This will even out the warping.
- Version 2: Glue two unpainted paper plates together using non-water-based glue. Make sure you spread the glue all the way to the edge. During the curing process, keep the pair pressed inside a stack of paper plates.
- This will serve as a 'backing' plate for any Christmas wall decorations that have started to warp. Once it's dry and hard, use non-water-based glue to bond it to the back of a warped plate (so you'll end up with four plates glued together instead of two).
- Keep the whole thing weighed down in the 'plate press' (Step 3 again) until it's completely dry.
There ya go ... Done! Merry Christmas!
Read More:
Yet to find the information you're looking for? Type a word or phrase into the search box below:
Return from Christmas Wall Decorations to Christmas Decorating Ideas
Return from Christmas Wall Decorations to the Dream Home Decorating Homepage





Would you prefer to share this page with others by linking to it?