DIY Tuscan Bathroom Design, Part 1: Tuscan Walls From Scratch
by Elisabetta
(Ohio (USA))
My husband and I bought a 1920s home in small-town Ohio 18 years ago, and let me just say that I'm not a home decorator by any stretch of the imagination.
We never spent the time or money on decorating, just on the improvements that were needed - basement waterproofing, roof, etc.
I didn't have one.
The ladies (who were mostly older than me) couldn't believe it. "Surely your bedroom," they'd say, "or what about your kitchen, living room, etc..." till I was hit with the realization that I had never put "myself" in any room of my house. It was what someone else did before we got there, or whatever we were able to put into place, but never "who we were".
That started to bug me. (Especially as the ladies went around the circle, revelling in their "creations" in their house and how much they loved this room or that room.)
Travelling was still a priority (and my husband's passion) so it was difficult to pilfer funds toward decorating. I also had no idea of what I liked--so didn't know how to proceed.
A friend made a comment once at the onset of my "finding my dream home" journey that really hit home. I was asking his advice on the color for the walls in my dining room, and when I remarked that I didn't know what I liked or didn't have my own "style", he said, "Yes, you do, but I think you're afraid of it."
That sounded ridiculous to me at the time, but I came to see that he was right. It's easy to get concerned about how someone else would view what I was thinking or doing, instead of just getting an idea and going with it.
The long and short of it - in our little 2 story house, with only a dining room, living room and kitchen on the first floor and 3 bedrooms and a bathroom on the second floor - after about 12 years, I would now find it difficult to tell you my favorite room. We've painted, made curtains, added our little "touches", still have mostly hand-me-down furniture, but I'm loving my home!
So, I found you, Renate, when surfing for ideas for the curtains in my bathroom. Still haven't landed anywhere yet, (going to Tuscany to look around in the fall!), but your comments and advice were very helpful.
And in our tiny little bathroom (which probably only has about 20 square feet worth of walking space), we've managed to create an Italian look that we love.
It started with the deal we got on the flooring.
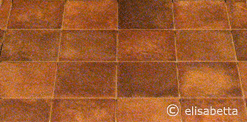
Having been to Tuscany before, and having seen the beautiful tiled floors - we were thrilled to try to duplicate that. It did create our "Tuscany", and helped the rest of the ideas to start flowing.
Next was the color of the walls.
Went looking many times for paint samples to match the flooring but didn't really have much money to spend on this project.
Luckily we remembered that the Tuscan homes we had seen did not have walls that matched the floors, but rather white or cream-colored walls. We had leftover cream, well I suppose it's off-white, paint from when we painted the living room. Luckily, our bathroom's very small, so we had plenty. But it looked a bit stark, so we decided to texture the walls.
We researched online and in books for techniques for this and had a pretty good idea of what we wanted to do. The best help, though, came from my sister-in-law who took a class in faux finishing. She happened to be in town and showed us how to add joint compound to the wall with a trowel and drag it down to create air pockets.
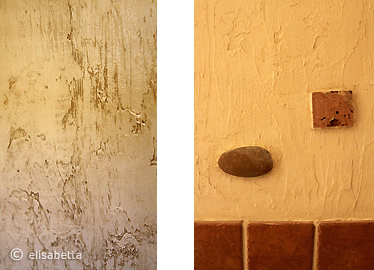
We smeared the joint compound thickly on the wall in about 1- to 2-foot square sections, then wiped the trowel clean, placed it flat-side against the wall and pulled it down the wall, dragging the joint compound down the wall. As it drags, it creates holes and lines.
We tried to smooth out lines made from the edge of the trowel and tried to only keep the lines that were made from the dragging of the compound against itself.
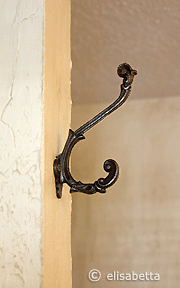
It took a bit to get comfortable and to find my style, but it finally came.
The result is not at all "even", the textures and colors are quite varied from wall to wall and even inch to inch, but, as I was doing it (and fretting a bit over my lack of consistency), I had to smile to myself as I realized my intent was to make them look old and worn...
...if they looked perfectly consistent, they wouldn't have the right feel. So, turns out my incompetence paid off!
Before tackling the actual walls, we started with a practice board - by the way, I HIGHLY recommend a practice board - just a piece of drywall, prepped just like the wall you have so it is a good imitation of what you can expect, and then you can experiment with technique and also with painting it once it's dry.
We painted ours - and didn't like it. Realized then that we'd have to "antique" it with the glaze - painting it on and wiping it off so that only portions remain darker.
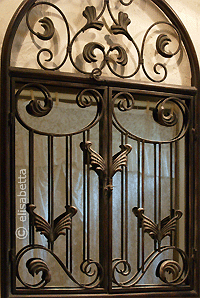
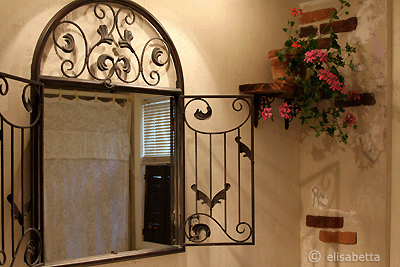
The best part, though, was the mirror that we found (on sale for half-price) at Hobby Lobby.
The bathroom had one of those fold-out utility mirrors that opened to a medicine cabinet. We needed to change that but weren't sure what to go with.
When my husband came over to my aisle in the store, holding this mirror, saying "What about this?", my eyes lit up and suddenly it kind of created the whole "look" of the bathroom. We were on our way!
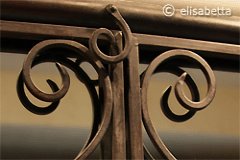
To follow: Part II - Bricks, Rocks, & Cracked Wood.
Renate's Reply: LOVE your story, Elisabetta - and that you stared down your self-doubts & just started experimenting! Love the mirror, too - so elegant yet rustic - a real statement piece. (And just in case you still have occasional doubts ... from the outside, it's blindingly obvious that you're one heckuva home decorator!)
Just in: Part 2 of DIY Tuscan Bathroom Design
Comments for DIY Tuscan Bathroom Design, Part 1: Tuscan Walls From Scratch
|
||
|
||
|
||
|
||
|
||
|
||
|
||
