Make Paper Snowflake Patterns, Step By Step

Make paper snowflake patterns that look like 'real', hexagonal snowflakes! (Instructions & free template download).
You will need:
♦ Letter/printer paper (or similar);
♦ Scissors;
♦ A 30-60-90 degree triangle (we want the 60° angle). If you haven't got one,
◊ Buy it here, or
◊ Make your own 60° triangle card with these instructions.
Make Paper Snowflake Decorations (Hexagonal Snowflakes)
A. How To Fold The Paper
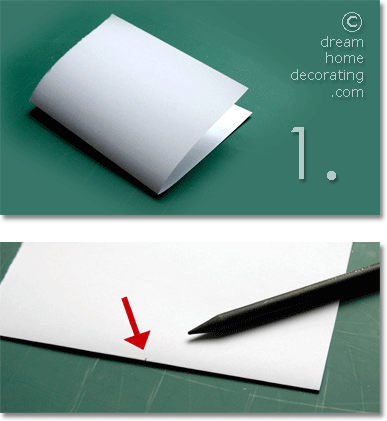
Step 1: Start with ½ A4/letter sheet. Fold the long side in half, as shown above, and mark the center of that fold (just eyeball it).
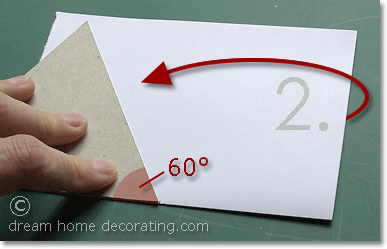
Step 2: Align the bottom of a 30-60-90 (or equilateral) triangle with the fold. Make sure the 60° angle ends directly at the pencil mark. Hold the triangle down while you fold the right side of the paper over the edge of the triangle. Pull it tight so you get a neat, clean fold ...
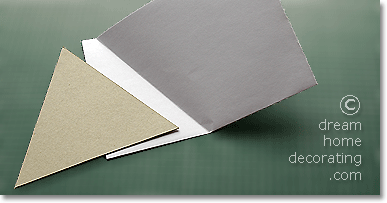
... like this ↑.

Step 3: Fold the right side of the paper over so the edge fits snugly into the valley of the previous fold (i.e. the dashed line). Now you have the six 60° angles you need to make paper snowflake patterns.
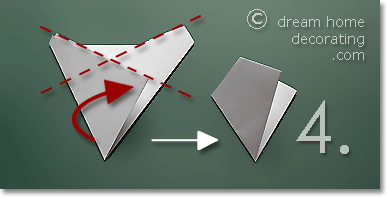
Step 4: Fold the left side back over the right, making sure the edges are flush. Cut excess paper off along both dotted lines.
Make Paper Snowflake Decorations (Hexagonal Snowflakes)
B. How To Cut A Snowflake
You can cut into the folded shape from all sides. Whatever you do at the center of the shape will repeat 6 times in the finalized snowflake. (Here, it's the gap between the spikes.) Whatever you cut on either side will repeat ony three times. In this simple snowflake, I created the sides as mirror images in order to get a regular snowflake pattern:
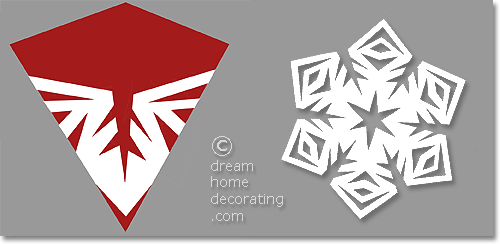
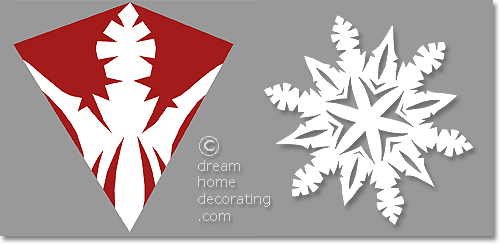
If you want an 'irregular' snowflake, just cut as you like and don't repeat yourself at all. You will end up with a snowflake pattern that has two sets of three identical shapes alternating with each other:
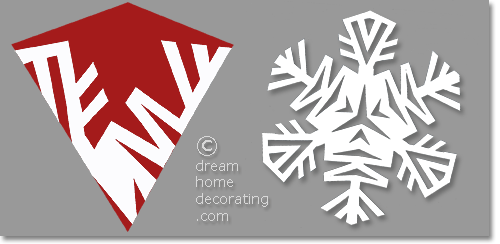
Go as squiggly ...

... and intricate as you like. Enjoy!
To download these paper snowflake templates, you will need Adobe Reader (the latest version is recommended) installed on your computer. You can get Adobe Reader here (a new window will open so you can download it without leaving this page).
To open the snowflake templates in your browser window, just click here.
Make Paper Snowflake Decorations (Hexagonal Snowflakes)
C. How To Make A 60-60-60 Triangle
You will need:
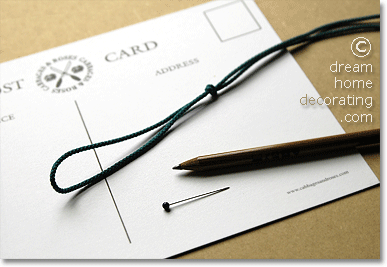
♦ Sturdy card that's not too thick =› you want a nice sharp edge;
♦ Cutting mat (not pictured);
♦ Craft knife (not pictured);
♦ Metal ruler (not pictured);
♦ Pencil;
♦ Pin;
♦ Non-elastic cord, ribbon, or twine.

Step By Step:
♦ Draw a straight line (about 4in/10cm) near the edge of your card. (My card was quite large so I used the printed line in the middle.)
♦ Knot your cord into a sling that's slightly shorter than your drawn line.
♦ Stick the pin through the knot and pin it securely into one end of the line. (Push the knot down towards the card).
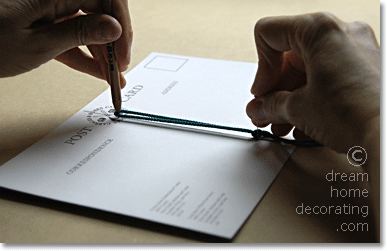
♦ Set your pencil into the end of the sling and pull the cord taut.
♦ Setting off from the straight line, start drawing a circle around the pin, always keeping the tension.
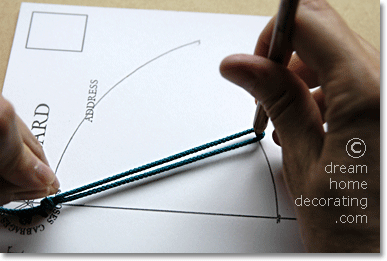
♦ When you have completed almost a quarter circle, stop and take the pin out of the card.
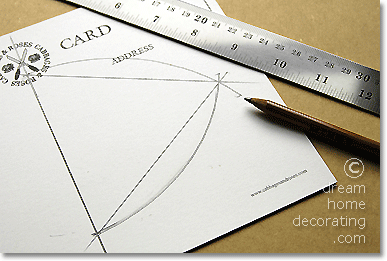
♦ Stick it into the spot where you began your first circle, and draw a new quarter circle (starting at the empty pinhole opposite).
♦ Your lines will cross exactly at the apex of an equilateral triangle, so all you have to do now is connect the dots:
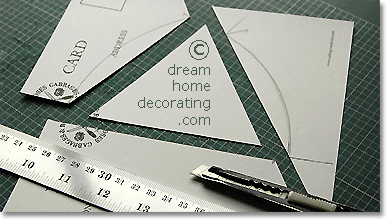
♦ Cut the triangle out ... voilà, three 60° angles to choose from ;-)
More Paper Snowflake Instructions & Xmas Paper Craft Ideas:
Yet to find the information you're looking for? Type a word or phrase into the search box below:
